What you need
- A Mac with macOS 12 or later.
- Your localization files, on disk: Flutter ARB, nested JSON, multi-language JSON, Apple
.stringsor Xcode String Catalogs (.xcstrings). See the supported formats. - Optionally, an AI model. On your Mac with Ollama or LM Studio, or in the cloud with your own API key. You can also translate everything by hand.
LocalePilot works locally: your files are only read, and nothing is written to them until you export.
1. Install LocalePilot
LocalePilot is distributed as a ZIP file, signed with a Developer ID certificate and notarized by Apple.
Signed and notarized ZIP for macOS 12 or later.
- Open the downloaded ZIP file: Finder extracts the LocalePilot app.
- Move LocalePilot to your Applications folder, then open it. The Projects screen appears.
Updates: LocalePilot looks for a new version once a day, or when you click Check for updates in Settings, Application. Nothing is downloaded or installed until you click Install in the update window. What the free plan and Pro include is on the pricing page.
2. Open your project
- On the Projects screen, click Open Project and choose the folder that holds your localization files.
- The Import Wizard scans the folder and shows what it found: formats, languages, files it will import and files it skips, with the reason.
- If several formats were found, the one with the most content is preselected. Confirm it with Use followed by the format name, or choose another one.
- Check the Source locale, the language your keys and texts are written in. If it misses keys that exist in other languages, the wizard says so and suggests a more complete one.
- Click Create Project.
Files are only scanned at this step. If only one language was found, add your target languages once the project is created, with Add a language… in the sidebar.
LocalePilot runs in the macOS App Sandbox: it only reads and writes the folders you open. If it loses access to a project folder, open the project again from Recent projects and choose the folder again.
3. Translate
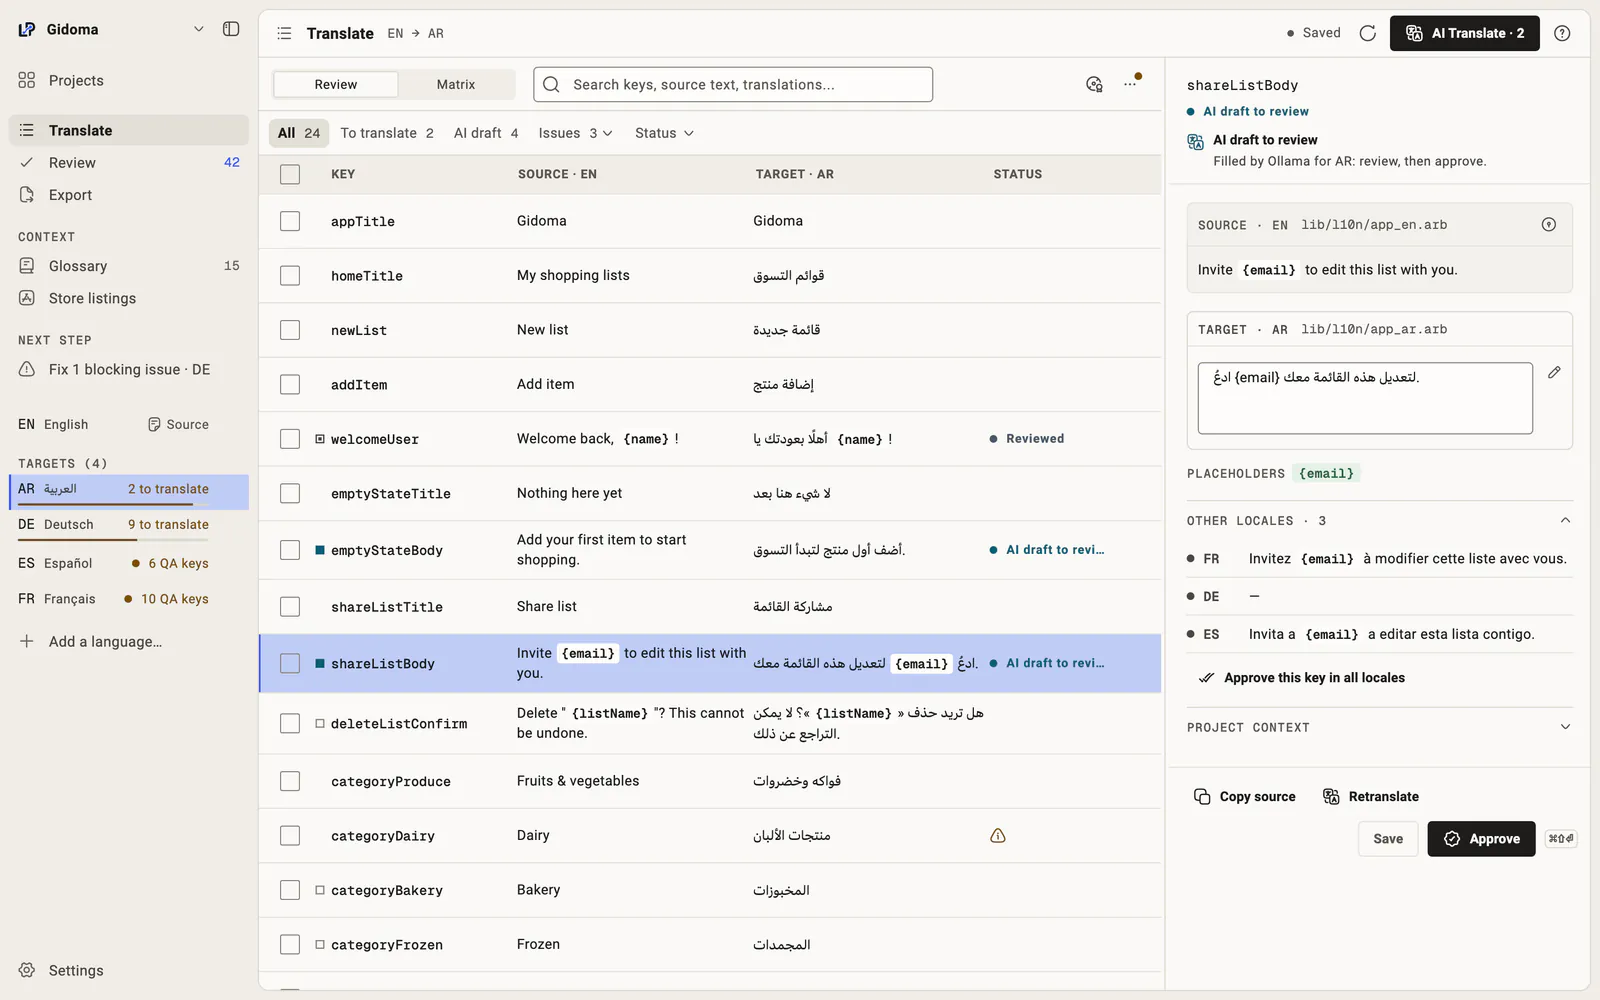
The Translate screen shows your keys in a table, with the source text next to the target language. Choose the target language in the sidebar. Above the table, All, To translate and AI draft narrow the list; Matrix shows every target language as its own column.
By hand
Select a row and press Enter to edit the translation, then ⌘ Enter to save it and move to the next one. Edits are saved in LocalePilot's local database; the save status at the top shows Saved. Typing never rewrites your files.
With AI
- Set up a provider in Settings, AI provider. On this Mac, Ollama and LM Studio: LocalePilot detects the local server and lists the models already downloaded. For a cloud provider (OpenAI, Anthropic, Gemini, DeepSeek) or a machine translation service (DeepL, Microsoft Translator, Google Cloud Translation), click Add a key and paste your own API key; it is stored in the secure storage of macOS. Test checks the connection.
- On the Translate screen, click AI Translate. The AI batch translation window opens.
- Choose the provider and the model, the Target locales (Active locale or All target locales) and the Entry selection, for example Missing + empty.
- Open Before you launch to see where the text is sent, how many requests the run makes and which keys are included. Then click Translate … cells with AI.
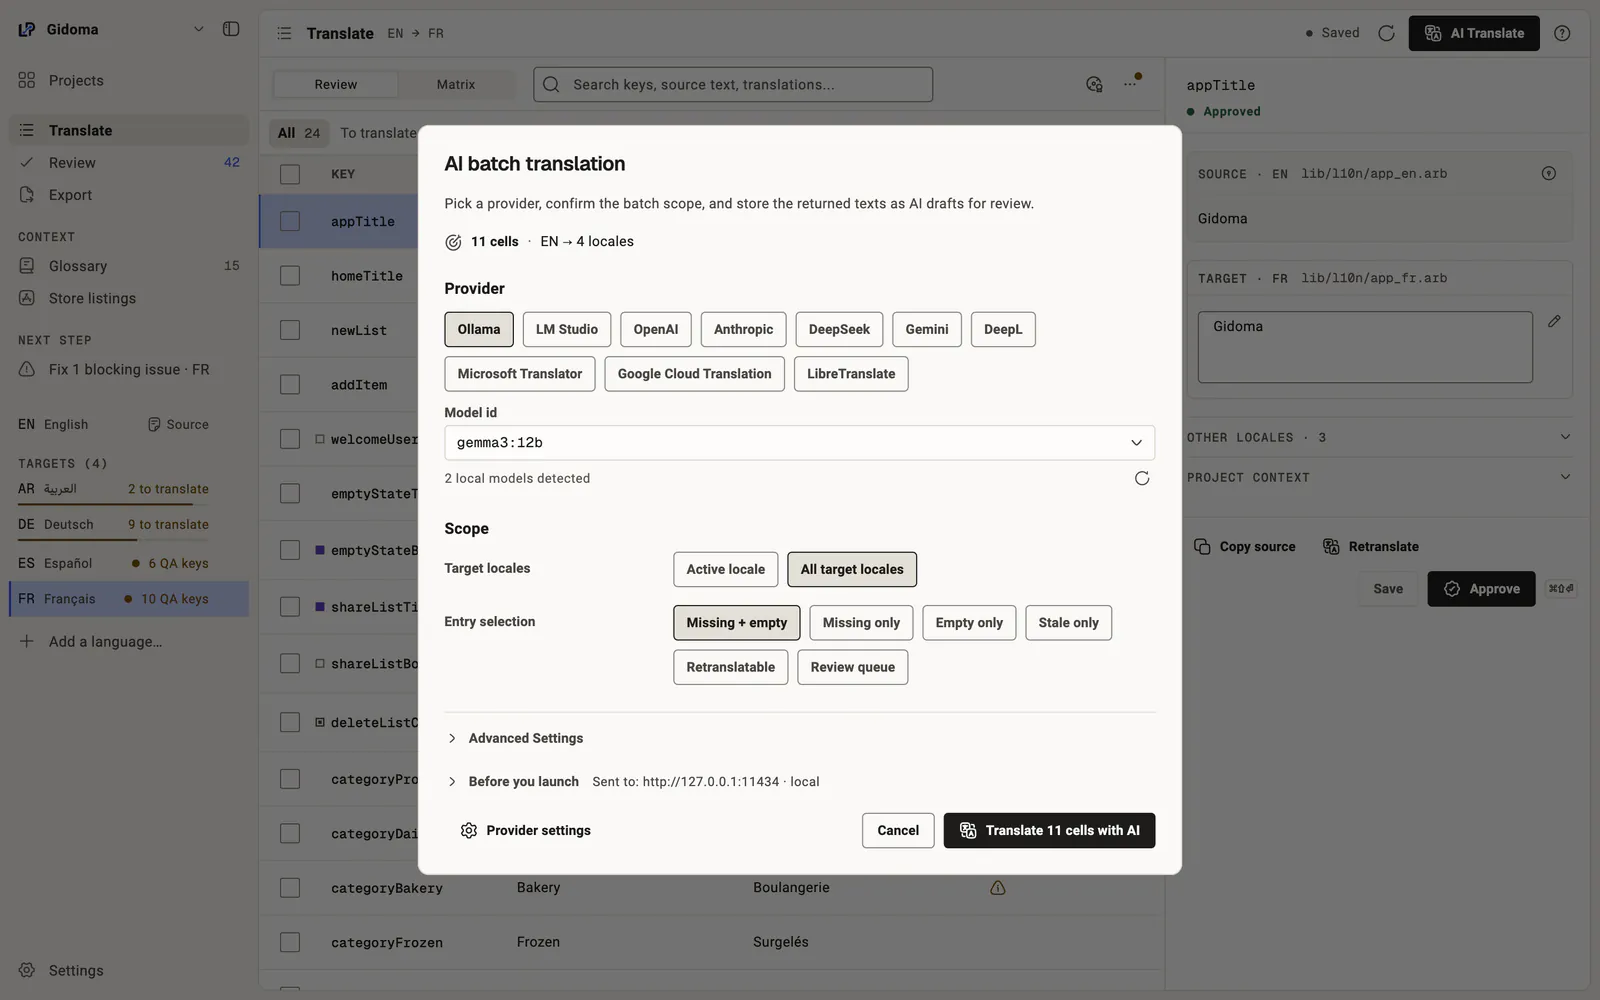
Each batch is saved as soon as it comes back, with the status AI draft to review. Your files are not touched. View drafts shows what was just translated.
Cloud AI providers require LocalePilot Pro. Local providers such as Ollama and LM Studio remain free. To set up a local model, see Translate a Flutter app with Ollama or LM Studio.
4. Review and approve
Select an entry and read it in the detail panel: source, translation, placeholders and the other languages. When it is right, click Approve, or press ⌘ ⇧ Enter to approve it and move to the next one. Approve this key in all locales does the same for every target language of the key.
Approving records your review. It is not a condition for export: an AI draft that nobody reviewed is exported like an approved entry. Before exporting, use the AI draft view to check that none is left.
5. Check QA
The Review screen lists everything QA found in the project, grouped by type: missing keys, empty values, placeholder mismatches, ICU risks, plural forms, source text copied as is, glossary terms, length warnings and more. Each problem has a severity: Blocking (it blocks export), Warning (needs review) or Info.
- Fix (Enter) edits the translation right there; Open in Translate shows it in the table.
- Approve as is when the translation is right despite the warning.
- I ignores a warning. Only warnings can be ignored; blocking problems and infos stay.
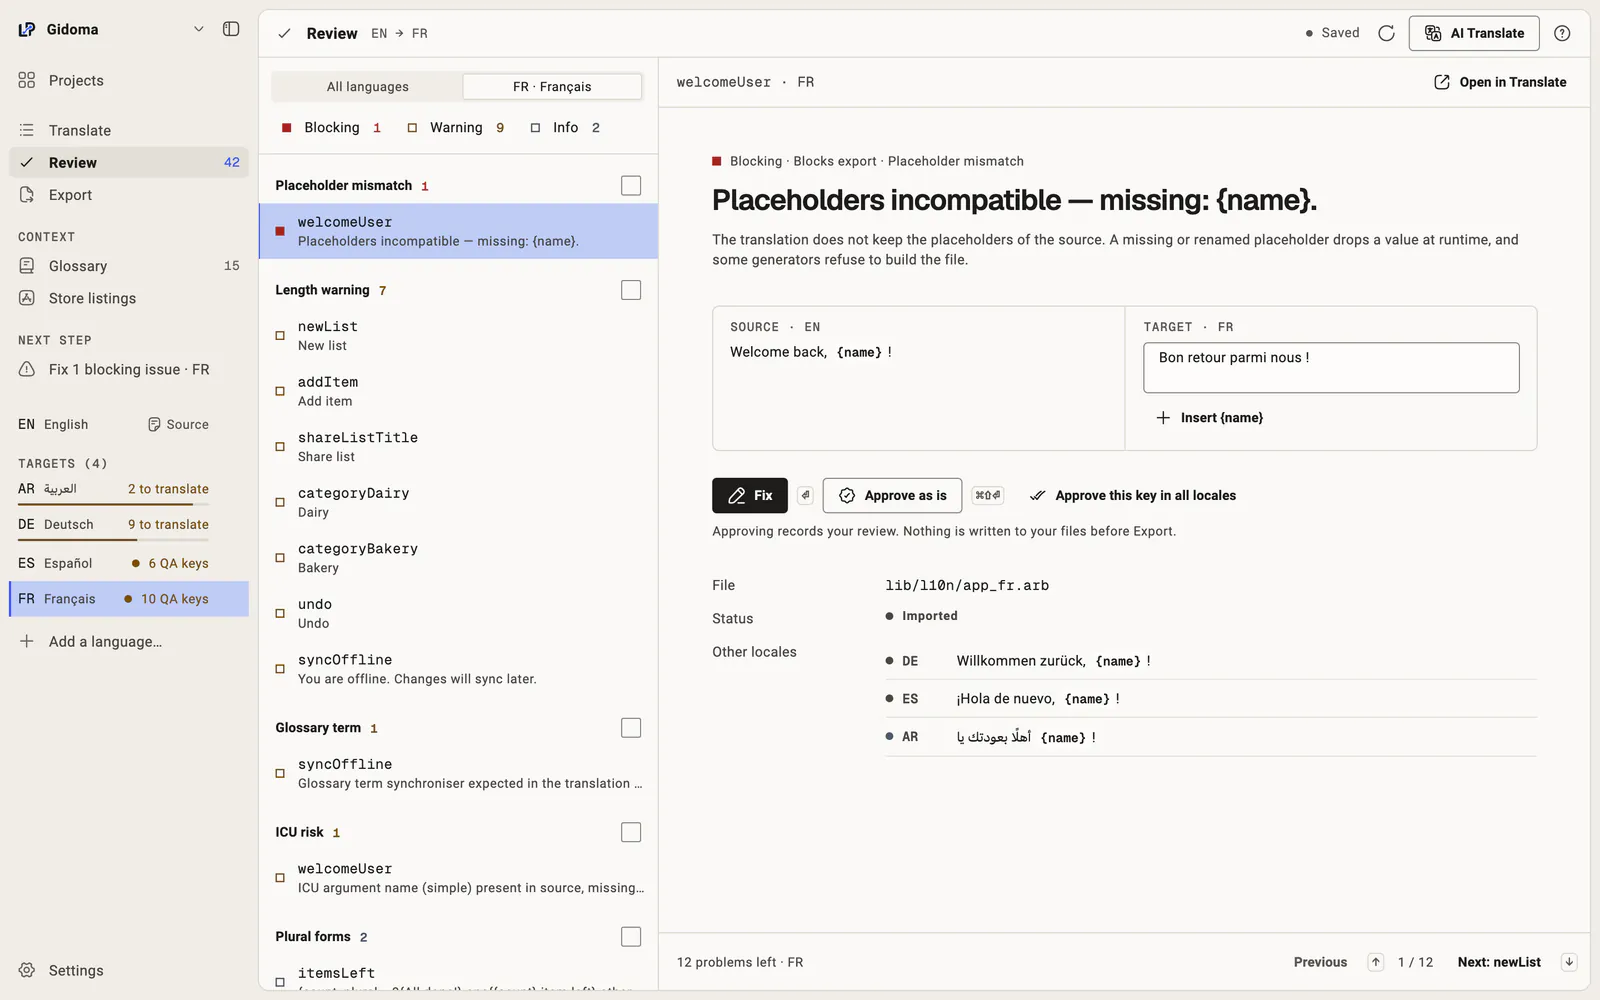
Approving or ignoring a QA problem records that decision. It does not write anything to your files.
6. Export
Export is the one step that writes your translation files back to disk. Click Export in the sidebar: the screen lists, file by file, what will be written, the remaining issues and the safeguards.
- Unfold a file to see its changes: the current value on disk and the value that will be written.
- Click Write … files. Each overwritten file is backed up first, in LocalePilot's own storage, never in your project.
- The result tells you what was written, skipped or backed up.
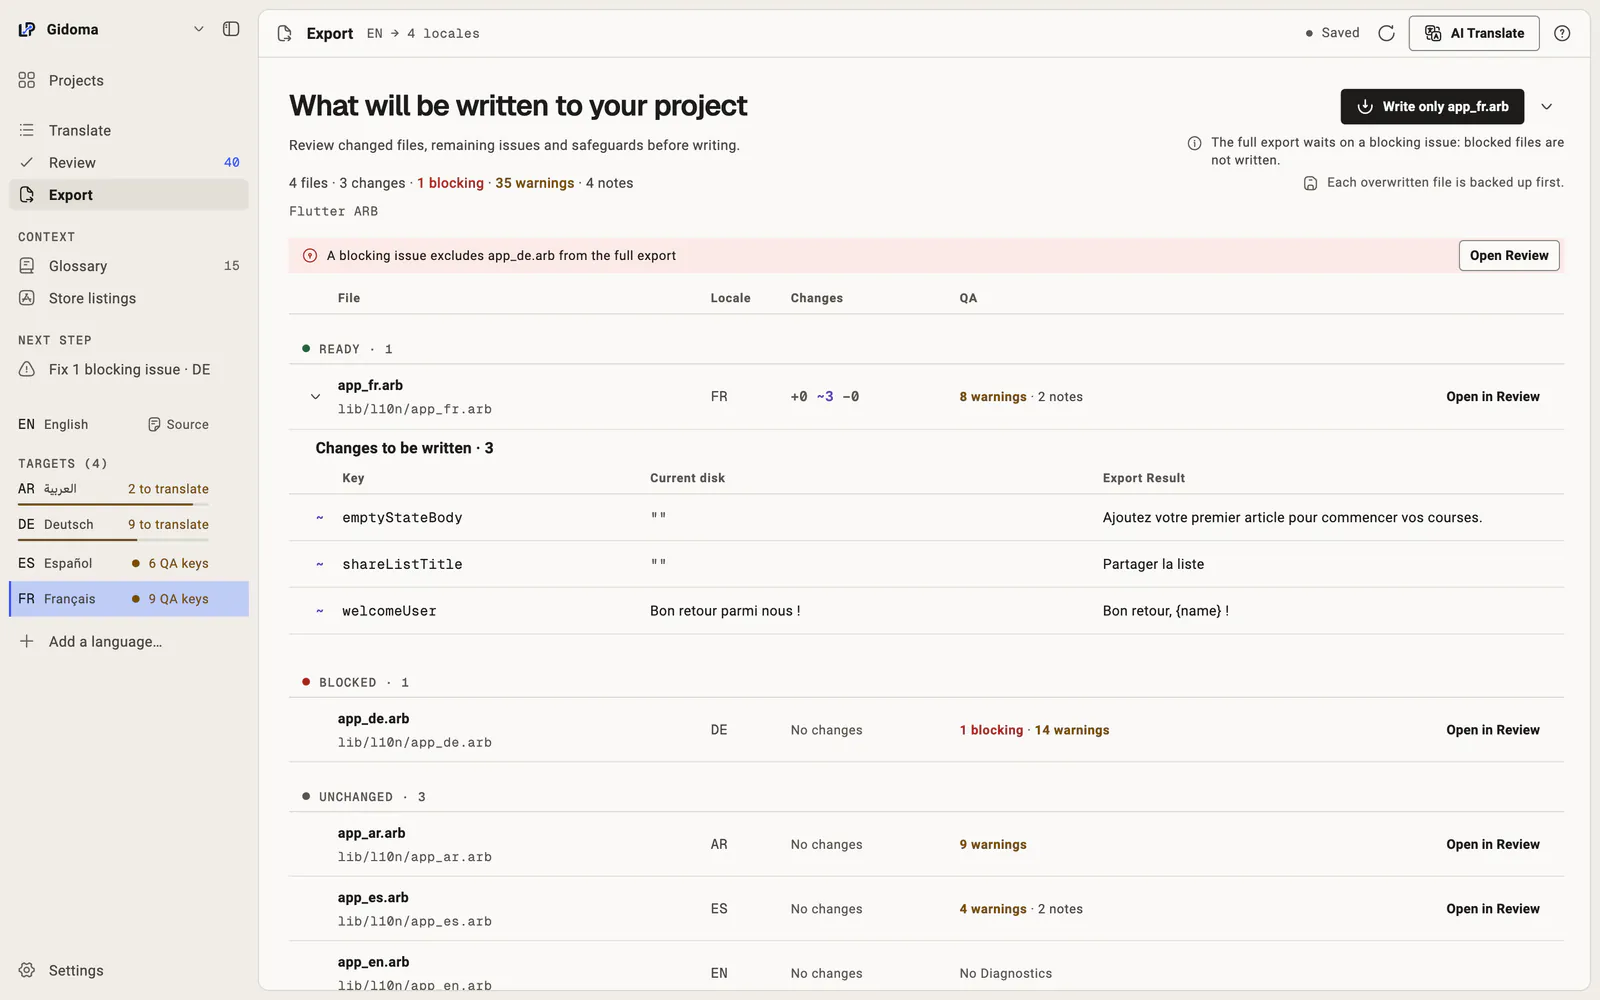
By default, a blocking QA problem keeps the affected files out of the full export (Block export when blocking issues remain, in the project settings). Fix the problem in Review, or write only the files without blockers with Write the … files without blockers. If a file changed on disk since it was loaded, LocalePilot does not overwrite it: it asks you to resolve the conflict first.
Your files are now up to date: review the changes in Git as usual.
Next steps
- Press ? on any screen to open the app's help for that screen. ⌘ K finds any command, section or language.
- If you publish on the stores, LocalePilot also adapts your App Store listing.
- The guides explain the formats: ARB, ICU plurals, String Catalogs, format specifiers.